When the Spybot starts for the first time, you will be asked a few questions which you can choose to ignore by repeatedly pressing the Next button, except for the update screen. This is the fastest way to update Spybot. The first of the two buttons will tell Spybot to search for updates and the second one (which will become active if updates are found) will automatically download and install all available updates in one click. After the last click on Next the main program starts.
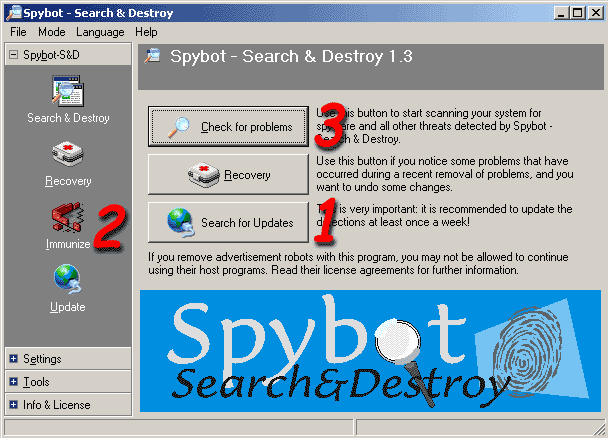
When you run the program, the first screen should look something like this:
Note: You can click on each of these images to open a new window with the full size of the image.
The first thing to do every time you run it is to update the program by clicking (1) Search for Updates (unless you just did that). Each time Spybot finds and installs an update, immediately click (2) Immunize in the left menu (see further down). Once both updates and immunizing are complete, click (3) Check for problems.
The update screen looks like this (skip this if you already did the update):
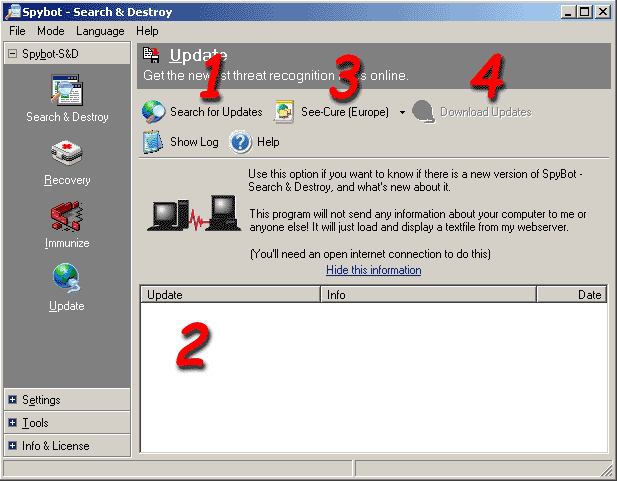
Press (1) Search for Updates first to see if there are any updates available. Anything it finds will show in the window (2) with empty checkboxes. Use the right mouse button to click on one and choose Select All. Then press (4) Download Updates. Spybot will automatically install them and restart itself.
Again, after each update, click the Immunize button on the left. This should bring you to the next screen:
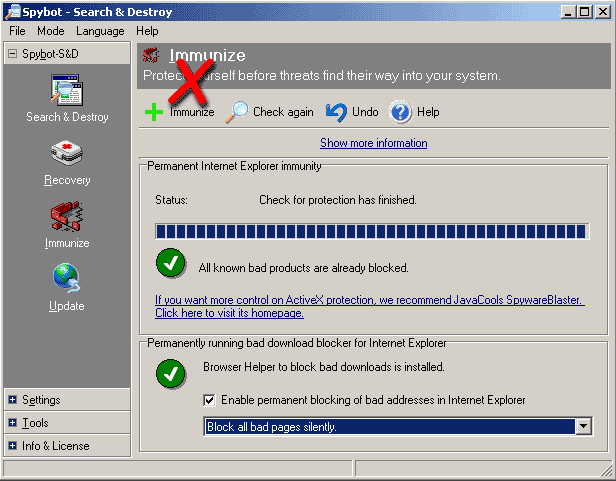
If a little popup window comes up asking you do "immunize", use the Immunize button next to the (X). Once both of the round icons in the middle show the white checkmarks on green, this step is done. Click Search & Destroy in the left menu to get to the next screen.

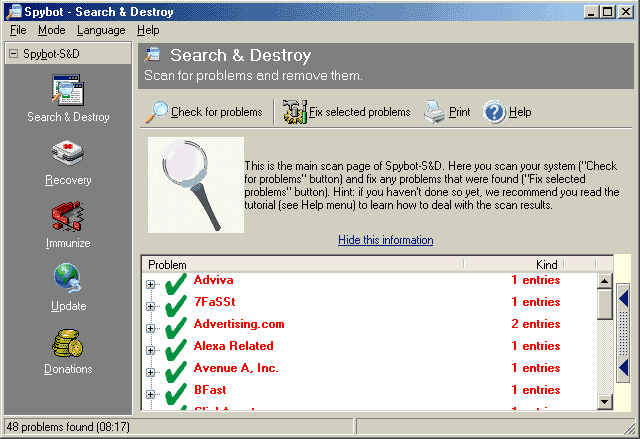
Click the Check for problems button to start scanning.
The scan usually takes 10-20 minutes depending on your computer speed. If the scan found any threats, the screen should look like this:

Click the Fix selected problems button. Spybot will first create a System Restore Point, then it will ask if you are certain you want to delete the threats it found. Choose yes.
When all threats are removed, the final screen comes up:
If you encounter any problems or screens that strongly differ from the ones in this tutorial, please read the detailed version.